 |
| |||||

| ||||||||||
Easy to assemble twin Neutrik NL4MPXX speakon dish kit for speakers
Fed up of wasting time wiring up links on speakons?
We were too...
So we created this handy little PCB which lets you quickly and easily link all pins on a pair of Neutrik NL4MPXX, with the option to mount a 4 way screw terminal block, or just solder 2.5mm wires directly to the PCB. Depending on your tools, we estimate that this can bring down the assembly time of a speakon panel down to under 4 minutes, whereas stripping back link wires and direct soldering can typically take 10-15 minutes (or more), a MASSIVE time saving if you're building batches of speakers.
You can secure wires with a cable tie using one or both of the slots cut into the PCB.
The PCB is a double sided PCB, and the side with the white silk screen print is where the pins of the speakon stick through. You should be able to see the pin identification on the PCB when soldering. The board will still work if mounted upside down, but the pin labelling will be incorrect.
The second image show the complete assembly with the speakon sockets mounted on a recess dish using M3 nuts/bolts.
The third and fourth images show alternative options without the screw terminal connectors and wires soldered direct to the board, and using the optional cable tie points for strain relief..
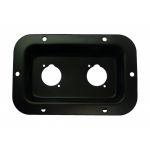
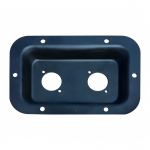
The spacing between connectors on this PCB is designed to match up perfectly with the provided twin speakon dish:TUFF8728 - Recessed Steel Connector Plate for 2 x Speakon - also available as a completely finished, fully soldered cabinet-ready sub assembly
Detailed specifications unavailable, please EMAIL the sales office for additional information.
| Other Tuff Cab products similar to Connector Dish Kit with 2 x NL4MPXX Speakons, Terminal Block & PCB: |
|
||
Connector Dish Kit with 2 x NL4MPXX Speakons, Terminal Block & PCB is a package consisting of the following items:
 |
1 x PCB9004 for TUFF8718 NL4MPXX Speakon Dish Links all 4 pins of 2 x Neutrik NL4MP spaced at 55mm centres |
10+ IN STOCK |
 |
2 x Neutrik NL4MPXX 4-pole SpeakON Panel Socket Replaces NL4MP |
100+ IN STOCK |
 |
4 x Tuff Cab M3 Hex Full Nut |
2216 IN STOCK |
 |
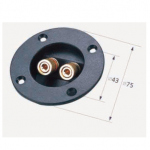
1 x PCB Screw Terminal 4 pin 10mm pitch for Crossover PCB - Grey |
10+ IN STOCK |
 |
4 x Screw M3 x 10mm Socket Button Screw/Bolt Black |
776 IN STOCK |
 |
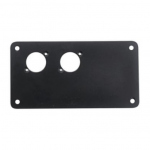
1 x Recessed Connector Plate for 2 x D-Type Speakon/XLR These are for flush mounting only, with the NL4 connector mounted from the rear |
 Due Approx: 14 Oct 2025 |
